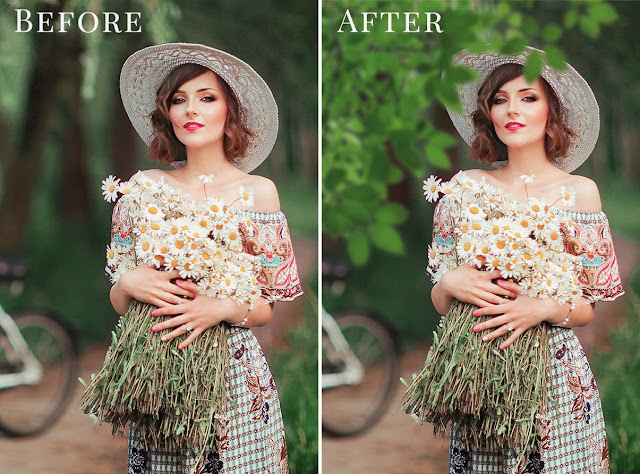
100 Sun Flare & Haze Overlays Free Download Our bright, be a my and haze themes can help you to create professional photos and add a variety of effects to your pictures quickly and easily. Just apply them on the image, set a blending mode and you’re done! Overlays Our sun-&-haze overlays are user-friendly and have intelligible video instructions.
When photographs are taken in the open air in heavy cloudy weather or strong sunshine, the result often does not meet expectations and is not necessarily suitable for sharing with others. With our sunny and hazy overlays you can turn dull or too bright shots into impressive pictures. Change the color, brightness and hue of the photos, add layers and create magic!
We recorded the overlays in our studio and used a whole range of different light tools, such as reflective glass and a professional camera. By using different light temperatures and light sources, we were able to produce truly individualized high-quality sun and haze images that give your photos a new depth or a new surreal look.You Can Also Download 1000 Photo Overlays Bundle
Do not get disappointed with bad lighting or boring composition to capture special moments in the picture! We offer you over 100 excellent overlays compatible with all main designing programs .You can get started and download the overlays right now to delve into the miraculous creativity world!
See what you will be able to do
Below you can find Preset Power Examples from each Package.


DETAILS:
• 100 photo overlays high resolution (5100 x 3450 p x – 300 dpi – JPEG);
• Compatible with any software that allows you to work with layers ( Photoshop, Photoshop Elements, Paint Shop Pro, etc.)
Download the File Easily From the Download Link Given Below
Password is: dgpik.com
How to Use Photoshop Overlays in Photoshop
- Open Photoshop: Launch Adobe Photoshop on your computer and open the image you want to work with by going to “File” > “Open” or by using the shortcut Ctrl+O (or Command+O on a Mac).
- Open Overlay Image: In Photoshop, go to “File” > “Open” or use the shortcut Ctrl+O (or Command+O on a Mac) to open the overlay image file.
- Copy Overlay Image: Once the overlay image is open, press Ctrl+A (or Command+A on a Mac) to select the entire image, and then press Ctrl+C (or Command+C on a Mac) to copy the image.
- Save Your Work: Once you’re satisfied with the overlay effect, save your image by going to “File” > “Save” or “Save As” to choose a new file name or format.
That’s it! By following these steps, you can effectively use overlays in Photoshop to enhance your images with various creative effects.


