

12 Outer Space Digital Paper Overlay Free Download A collection of 10 out of this world space digital paper. Use to elevate all your design projects to another level.The captivating designs inspired by the wonders of the cosmos.You Can Also Download 12 Northern Night Digital Paper Overlay
These high-quality overlays feature celestial elements, nebulae, galaxies, stars, and more. Perfect for digital art, scrap booking, or adding an ethereal touch to your designs, these Overlays bring the beauty of outer space to your projects.
See what you will be able to do
Below you can find Preset Power Examples from each Package.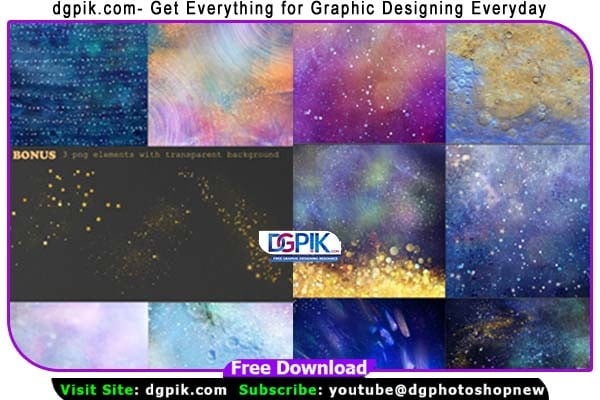
Included in this set:
• 10 digital papers (12 x 12 inch, 3600 x 3600 px) – 300 ppi – .JPG file format
Software compatibility: .JPG files will work with most graphic software.
Download the File Easily From the Download Link Given Below
Password is: dgpik.com
How to Use Overlays
- Choose the software: Determine which software you want to use for overlaying elements. Popular options include Adobe Photoshop, Adobe Premiere Pro, GIMP (free), or online tools like Canva or Pixlr.
- Open the base image/video: Start by opening the image or video you want to overlay elements onto. This will serve as the background or base layer.
- Create or import the overlay: Next, you need to create or import the elements you want to overlay. These could be text, graphics, or images. Some software applications provide pre-designed overlays, or you can create your own using the software’s drawing or text tools. If you’re using external images, make sure they have a transparent background for seamless integration.
- Position and resize the overlay: Once you have your overlay element, position it on top of the base image/video. Most software applications allow you to drag and drop the overlay to the desired location. You can also resize, rotate, or skew the overlay to fit your needs.
- Adjust transparency and blending mode: Depending on the effect you want to achieve, you might need to adjust the transparency or blending mode of the overlay. Transparency controls the visibility of the overlay, while blending mode determines how the overlay interacts with the underlying layers. Experiment with different settings to achieve the desired look.
- Fine-tune the overlay: Use the available editing tools in your chosen software to fine-tune the overlay. This could involve adjusting colors, adding effects, applying filters, or modifying the text formatting.
- Preview and save: Once you’re satisfied with the overlay, preview the result to ensure it looks as intended. Play the video or view the image at full size to check for any issues. If everything looks good, save your work. Some software applications allow you to export the final composition as a separate file, while others might require you to save the project file, which preserves all the layers for future editing.
Remember that the exact steps may vary depending on the software you’re using, but the general principles remain the same. Take some time to explore the specific features and tools of your chosen software to maximize your creative possibilities with overlays.