41 Falling Rose Petals Photo Overlays Free Download Have you ever wallowed in rose petals? With our overlays, everything is possible, especially when it comes to seductive red roses. Red petals are symbolic and mean a profound passion, deep desire, eroticism and romance. In case you want to incorporate red rose petals thematically in your pictures, Photo Overlays these textures are available for you in the magnificent pack of 25 PNG overlays + 16 PNG separate petals.
To add the rose petals, you need to choose the desired overlay and drag it on your image. The rest is your creativity: move the leaves to the right location, adjust their size and cut out individual copies, if necessary. In the total of 41 images you will find both falling and lying red rose petals. Sometimes a few leaves come into focus in a texture, and then dozens float by – a variety of motifs in which you will surely find exactly what you are looking for.You Can Also Download 1000 Photo Overlays Bundle
Acquire gorgeous shots from photography professionals and use them as an effect, overlay, picture element or background. Red roses rule! Work with falling and lying rose petals, easily paste them into your photos and spring your secretive fantasies to life!
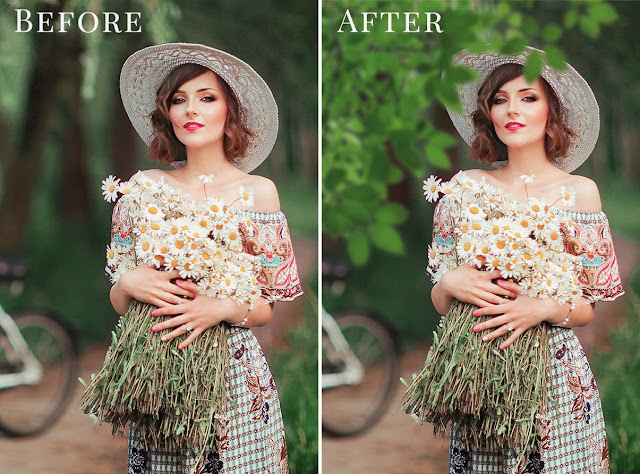
See what you will be able to do
Below you can find Preset Power Examples from each Package.
DETAILS:
25 PNG Falling Red Rose photo overlays with transparent background.
16 PNG Separate Rose Petals with transparent background.
High resolution (5100x3450px – 300dpi)
Compatible with any software that allows you to work with layers ( Photoshop, Photoshop Elements, Paint Shop Pro, Pic Monkey, Gimp and etc.)
Download the File Easily From the Download Link Given Below
Password is: dgpik.com
How to Use Photo Overlays in Photoshop
Using photo overlays in Photoshop can add creative and decorative elements to your images. Here’s a step-by-step guide on how to use photo overlays in Photoshop:
- Open Photoshop: Launch Adobe Photoshop on your computer and open the image you want to edit.
- Obtain photo overlays: Find the photo overlays you want to use. These can be images or graphics with transparent backgrounds, such as light leaks, bokeh effects, textures, borders, or other decorative elements. You can create your own overlays or download them from various online resources.
- Place the overlay: Drag and drop the overlay onto the Photoshop canvas. If the overlay is larger than your image, you may need to resize it. To do this, go to “Edit” -> “Free Transform” or press “Ctrl+T” (Windows) or “Cmd+T” (Mac). Hold the Shift key while dragging the corners to maintain the aspect ratio, and press Enter when you’re done.
- Adjust the blending mode: With the overlay layer selected in the Layers panel, experiment with different blending modes to achieve the desired effect. Common blending modes for overlays include Screen, Overlay, Soft Light, and Multiply. You can find the blending modes in the drop-down menu at the top of the Layers panel.
- Modify the opacity: If the overlay is too intense, you can reduce its opacity to make it more subtle. Adjust the opacity slider in the Layers panel until you’re satisfied with the result. You can also use layer masks to control the visibility of specific areas of the overlay.
- Edit and refine: If needed, you can further edit and refine the overlay by applying adjustments, filters, or other Photoshop tools to enhance its appearance. For example, you can use the Levels or Curves adjustment to modify the overall brightness and contrast, or the Hue/Saturation adjustment to change the color of the overlay.
- Arrange layers: To rearrange the layers, you can click and drag them in the Layers panel to change the stacking order. This allows you to control which elements appear on top of others.
- Save your work: Once you’re satisfied with the overlay effect, save your edited image. Go to “File” -> “Save As” or “Export” to save it in your desired file format (e.g., JPEG or PNG).
By following these steps, you can easily incorporate photo overlays into your images using Photoshop and achieve various creative effects.


