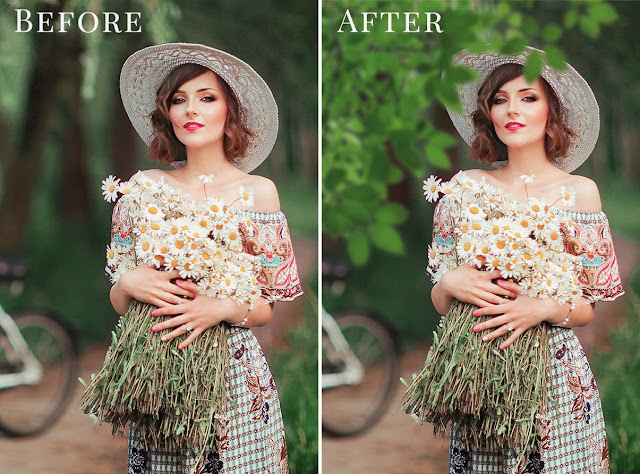
51 Christmas Tree Brunch Overlays Free Download Just imagine your photos in the atmosphere of these Christmas Tree. There is a set of 51 Christmas Tree photo effects which helps you to work easier. You Can Also Download Photo Overlays

Christmas Tree Brunch PNG overlays are a collection of festive graphics that can be used to enhance your holiday-themed designs and photographs. These overlays typically feature Christmas trees adorned with ornaments, lights, and other decorative elements. They provide a quick and easy way to add a touch of holiday spirit to your images, invitations, greeting cards, and more. You Can Also Download Christmas Tree Branches Photo Overlays

DETAILS & SPECIFICATIONS of
– 51 PNG files
– Width 4500 px
– High resolution ready to print 300dpi
– Photoshop overlay actions to easy apply
– Friendly instructions inside
EASY TO USE
– Text Instructions inside
– Photoshop Actions to easy apply
Download the File Easily From the Download Link Given Below
Password is: dgpik.com
How to Use Png Overlays
Using PNG overlays in image editing software allows you to add decorative elements, textures, or effects to your photos. Here’s a step-by-step guide on how to use PNG overlays:
- Open your image editing software: Launch your preferred image editing software such as Adobe Photoshop, GIMP, or Pixlr.
- Open your base image: Open the image you want to apply the PNG overlay to. This will serve as the base image.
- Open the PNG overlay: Navigate to the location of the PNG overlay file on your computer. Open the PNG overlay file in your image editing software. It will appear as a separate layer on top of your base image.
- Layer masks and erasing: If needed, use layer masks or erasing tools to selectively reveal or hide parts of the PNG overlay. This allows you to blend the overlay seamlessly with your base image.
- Fine-tune and adjust: Make additional adjustments to the overlay and base image as desired. This may include color corrections, saturation adjustments, or applying filters or effects.
- Save your final image: Once you are satisfied with the result, save your edited image in your desired file format, such as JPEG or PNG.
Remember to experiment with different overlays, blending modes, and opacity levels to achieve the desired artistic effect. PNG overlays provide a great way to enhance and transform your images with creative elements.


