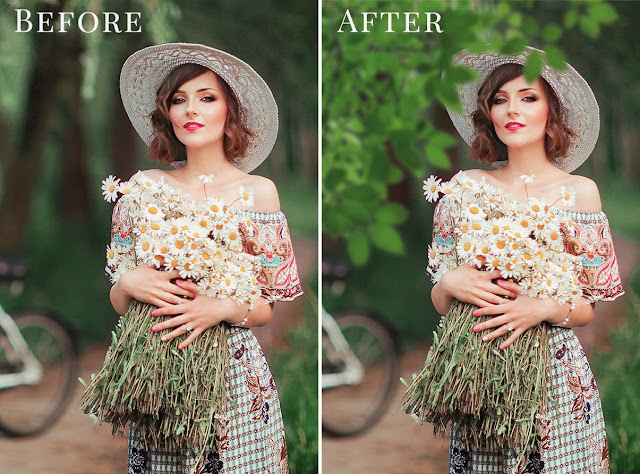
80 Golden Light Effect Bokeh Overlays Free Download to add sparkle and glaimor to your projects!Enhance your photos with a stunning collection of 80 bokeh Overlays.
These golden lights add a magical touch to your images, creating a dreamy atmosphere. Easily apply and adjust them in Photoshop for a beautiful and enchanting visual effect.”You Can Also Download Lights & Stars Clipart With Backgrounds Overlay
Below you can find Preset Power Examples from each Package.
Included in this set:
• 80 photo bokeh overlays high resolution (5100x3450px – 300ppi – .JPG)
• Compatible with any software that allows you to work with layers ( Photoshop, Photoshop Elements, Paint Shop Pro, etc.)
• Note to the Lightroom users – please, make sure you have a plugin that allows you to work with layers.
• Very easy to use! Instructions step by step included.
Software compatibility: .JPG files will work with most graphic software.
Download the File Easily From the Download Link Given Below
Password is: dgpik.com
How to Use Photo Overlays
Photo overlays are a creative way to enhance your images and add visual interest. They can be used to add textures, effects, text, or graphic elements to your photos. Here’s a step-by-step guide on how to use photo overlays:
- Select your photo editing software: You’ll need a photo editing software that supports layers, such as Adobe Photoshop, Adobe Photoshop Elements, GIMP, or Canva.
- Choose your overlay: There are various sources where you can find photo overlays. You can either create your own overlays or download them from websites that offer free or paid overlays. Look for overlays that suit the mood or effect you want to achieve.
- Open your photo and the overlay: Open your base photo in your editing software. Then, import or open the overlay image as a separate layer. In most software, you can do this by going to “File” and selecting “Open” or by dragging and dropping the overlay onto your base photo.
- Resize and position the overlay: Depending on the overlay and the desired effect, you may need to resize and reposition it. Use the transformation tools in your editing software to adjust the size, rotation, and position of the overlay layer. This is typically done by selecting the overlay layer and using the “Transform” or “Resize” options.
- Blend the overlay: To make the overlay blend seamlessly with your photo, you’ll need to adjust the blending mode and opacity of the overlay layer. Experiment with different blending modes like “Screen,” “Overlay,” “Multiply,” or “Soft Light” to see which one works best for your photo. Reduce the opacity of the overlay layer if you want a more subtle effect.
- Refine the effect: Depending on the overlay and your vision, you may need to make further adjustments to achieve the desired effect. You can apply additional adjustments such as brightness, contrast, saturation, or color grading to the overlay layer or the entire image.
- Fine-tune the composition: Pay attention to the overall composition of your photo after adding the overlay. You may need to crop or resize the image, make additional edits, or consider the placement of other elements in the photo to achieve a balanced and visually appealing result.
- Save your edited photo: Once you’re satisfied with the result, save your edited photo in a suitable file format such as JPEG or PNG. It’s a good practice to save your edited photo as a new file, so you have a copy of the original image.
By following these steps, you can effectively use photo overlays to enhance your images and create unique visual effects. Remember to experiment and have fun with different overlays to find the style that best suits your creative vision.


