100 Night Sky Photo Overlays Free Download As trophotography is a real challenge for both experienced cameramen and design beginners. You have to be a real connoisseur to know what place, day, time and weather to choose. It is important to be patient and wait until the moon is still quite high in the sky and the Milky Photo Overlays Way unfolds in its entire splendor.
Our overlays are designed to give a night-sky effect to admire and share magic photos with this terrific background.
Here you are able to choose among 100 ready night-sky overlays of various sizes that are quite functional with any software you work with. Video tutorial and free technical support are also available for you day and night.You Can Also Download 1000 Photo Overlays Bundle
Night sky with all its elements creates mysticism. It’s a special moment: at night, we are guests of the environment not knowing what to expect. With our overlays, you are able to be alone in front of the stars and enjoy the melody of waves, the sounds of animals and the wind.
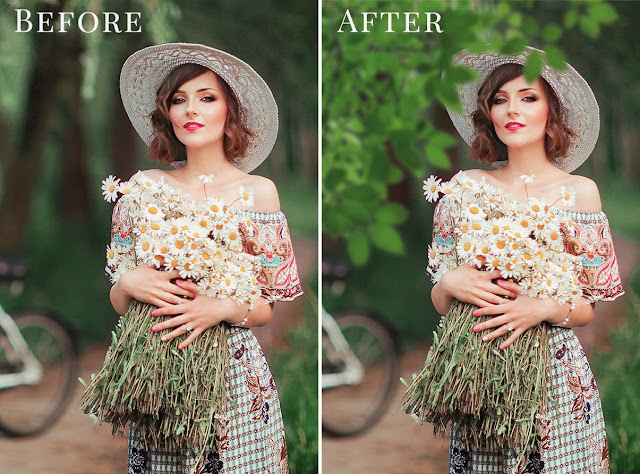
See what you will be able to do
Below you can find Preset Power Examples from each Package.


DETAILS:
100 Night Sky photo overlays high resolution (sizes are different approx 4500 x 2700 px at 300 dpi jpeg)
Easy to apply ( Tutorial is included )
Compatible with any software that allows you to work with layers ( Photoshop, Photoshop Elements, Paint Shop Pro, etc.)
Lightroom users – you need a plugin that allows you to work with layers
Download the File Easily From the Download Link Given Below
Password is: dgpik.com
How to Use Overlays in Photoshop
Using overlays in Photoshop allows you to add creative elements, textures, or effects to your images. Here’s a step-by-step guide on how to use overlays in Photoshop:
- Open your image: Launch Photoshop and open the image you want to work with by going to “File” > “Open” or by dragging the image into the Photoshop workspace.
- Add an overlay: Find the overlay you want to use. Overlays can be textures, patterns, light leaks, bokeh effects, or any other image that you want to superimpose onto your original image. You can create your own overlays or find pre-made ones online. Open the overlay image in Photoshop.
- Copy the overlay: Select the overlay image by pressing Ctrl/Command + A to select all, then press Ctrl/Command + C to copy the overlay image.
- Paste the overlay onto your image: Switch back to your original image and press Ctrl/Command + V to paste the overlay onto the image. The overlay will be pasted as a new layer above your original image layer.
- Save your edited image: Once you’re satisfied with the overlay effect, save your image by going to “File” > “Save” or “File” > “Save As” and choose your desired file format.
That’s it! By following these steps, you can easily use overlays to add creative and artistic elements to your images in Photoshop.


