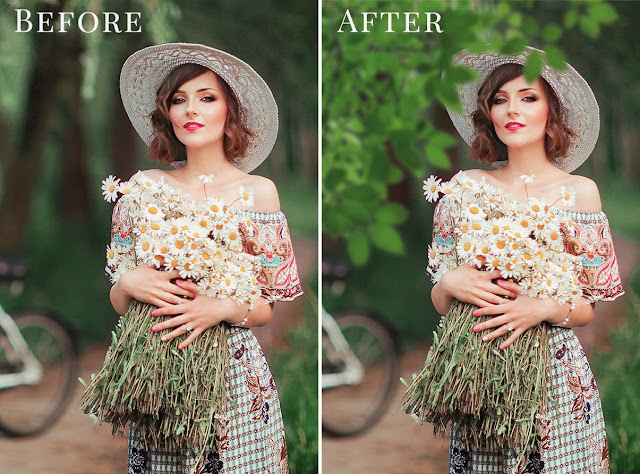
80 Abstract Neon Lights Effect Photoshop Overlays Free Download is perfect for those who are looking to create eye-catching and attention-grabbing graphics. This pack of high-res JPG images featuring a stunning collection of vivid, glowing neon effects and nebula overlays. Overlay vibrant pinks and blues to edgy gradients and abstract shapes, allowing you to experiment and create stunning visuals that truly stand out. Whether you’re designing a poster, social media graphics, commercial ads as an exemple, these abstract lights are perfect for adding a bold and futuristic look to your artwork. Download now and let your art shine! You Can Also Download 1600 Photo Overlays Bundles


Download the File Easily From the Download Link Given Below
Password is: dgpik.com
How to Use Photo Overlays in Photoshop
Using photo overlays in Photoshop allows you to add creative elements, textures, or effects to your images. Here’s a step-by-step guide on how to use photo overlays in Photoshop:
- Open Photoshop: Launch Adobe Photoshop on your computer.
- Open your image: Go to “File” and select “Open” to import the image you want to edit.
- Download or create overlays: Find photo overlays you’d like to use from various sources. You can download them from stock photo websites or create your own using graphic design software.
- Open the overlay file: If the overlay is in a separate file, open it in Photoshop. Make sure the overlay file and your image are both open in separate tabs or windows.
- Select and copy the overlay: In the overlay file, use the “Move Tool” (V) to select the overlay. Press “Ctrl+A” (Windows) or “Cmd+A” (Mac) to select the entire overlay. Then, press “Ctrl+C” (Windows) or “Cmd+C” (Mac) to copy the overlay to the clipboard.
- Paste the overlay onto your image: Go to your image file and press “Ctrl+V” (Windows) or “Cmd+V” (Mac) to paste the overlay onto your image. The overlay will appear as a new layer.
- Adjust the size and position: Use the “Transform Tool” (Ctrl+T/Cmd+T) to resize and reposition the overlay layer as desired. Hold the “Shift” key while resizing to maintain the aspect ratio. You can also use the move tool (V) to adjust the overlay’s position on the image.
- Blend the overlay: Change the blending mode of the overlay layer to achieve the desired effect. The blending mode options are located in the top toolbar of the layers panel. Experiment with different blending modes like “Multiply,” “Screen,” or “Overlay” to see which one works best for your image.
- Refine the overlay: Use additional Photoshop tools like “Eraser Tool” (E) or layer masks to refine the overlay. You can erase parts of the overlay you don’t want or use layer masks to hide or reveal specific areas of the overlay.
- Adjust opacity and color: If needed, you can lower the opacity of the overlay layer to make it more subtle. You can also adjust the color of the overlay by adding adjustment layers or applying color correction techniques.
- Save your edited image: Once you’re satisfied with the overlay placement and adjustments, go to “File” and select “Save As” to save your edited image in your preferred format.
That’s it! By following these steps, you can effectively use photo overlays to enhance your images in Photoshop. Remember to experiment and try different overlays and blending modes to achieve your desired artistic effect.


