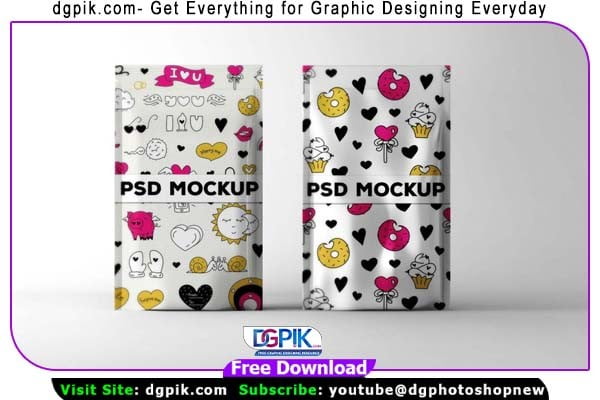
New Pouch Label PSD Mockups Free Download The free graphic offered by Mockup can be used for personal and commercial purposes so you can include it in your clients’ presentations, online posts and websites, and artwork portfolios. It has a lot of effects like reflection, front reflection, glow, shadows, lights, bevel, extrude, etc. You Can Also Download

Additional info:
- Available Format: Layered PSD through smart object insertion
- License: For private & commercial purpose
- Zip File Includes: Photoshop PSD File
- Resolution: 3000 x 2250 px
- Exclusive for Mockup
- Easy to use and edit
Fully customizable Photoshop Template.
- Add your own .png transparent logo
- Save and Save your JPG File.
Download the File Easily From the Download Link Given Below
Password is: dgpik.com
DOWNLOAD NOWNew Pouch Label PSD MockupsHow to Use Psd Mockup in Photoshop
Using a PSD mockup in Photoshop is a straightforward process. PSD mockups are pre-designed templates that allow you to showcase your designs or artwork in a realistic and professional manner. Here’s a step-by-step guide on how to use a PSD mockup in Photoshop:
- Find a PSD Mockup: Search for a suitable PSD mockup online. There are various websites that offer free and premium PSD mockups. Make sure to choose a mockup that matches the type of design or artwork you want to present.
- Download and Extract: Download the PSD mockup file to your computer. It will typically be in a compressed format such as ZIP or RAR. Extract the contents of the file to a location of your choice.
- Open the PSD Mockup: Launch Adobe Photoshop on your computer. Go to “File” in the menu bar and select “Open.” Locate and select the PSD mockup file you downloaded and extracted. Click “Open” to open the mockup in Photoshop.
- Customize the Mockup: The PSD mockup will likely contain multiple layers and smart objects. Smart objects allow you to easily replace the content with your own design. Locate the smart object layer(s) in the Layers panel. They are usually labeled as “Smart Object” or “Your Design Here.”
- Edit the Smart Object: Double-click on the smart object layer to open it. A new document window will appear with the contents of the smart object. This is where you can insert your own design.
- Insert Your Design: In the smart object document, you can either paste your design or artwork directly or place it as a linked file. If you choose to place it as a linked file, go to “File” > “Place Embedded” or “Place Linked” and select your design file. Resize and position it within the smart object canvas as needed.
- Save and Close the Smart Object: Once you’ve inserted your design, save the changes to the smart object document (e.g., by pressing Ctrl/Command + S or going to “File” > “Save”). Then close the smart object document.
- Update the Mockup: In the main PSD mockup file, you’ll see that your design has now been applied to the smart object layer. If necessary, you can make additional adjustments, such as resizing, rotating, or applying layer styles.
- Save and Export: Once you’re satisfied with the placement of your design in the mockup, save the final file. You can use “File” > “Save” or “Save As” to save it in PSD format for further editing. If you’re ready to share or use the mockup, go to “File” > “Export” > “Export As” or “Save for Web” to export it in a suitable format, such as JPEG or PNG.
That’s it! You have successfully used a PSD mockup in Photoshop to showcase your design or artwork.
