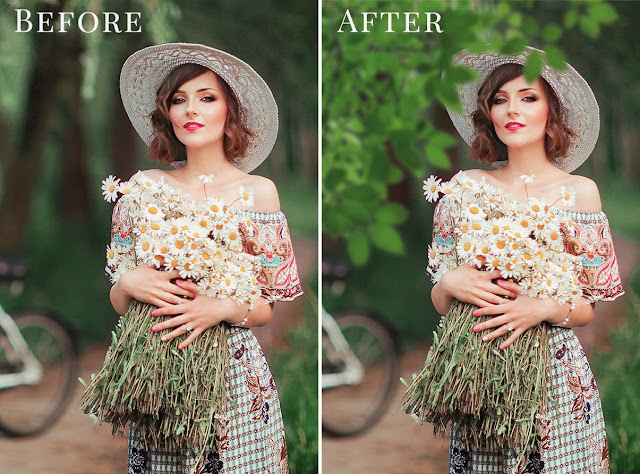

Sunlight Shadows 40Photoshop Overlays Free Download are a set of creative tools that add realistic and dynamic lighting effects to your photos. They include various styles, angles, and intensities, allowing you to enhance your images with stunning sunlit shadows that bring depth and drama to your compositions. Perfect for photographers, designers, and digital artists seeking to elevate their visuals to the next level. 160 Color Smoke Photo Overlays

INCLUDES:
• 40 Photoshop Overlays
• High Resolution (up to 6000*4000px 300 dpi)
• File Type – PNG
• Photoshop Actions compatible with Photoshop CS3 – CC2017
• Fully compatible with JPG, TIFF, PNG and RAW Images (All Formats)
• Work on Mac and PC
If you want you can also Download. Photoshop Overlays
Download the File Easily From the Download Link Given Below
Password is : dgpik.com

How to Use Photoshop Overlays
- Open your image in Photoshop.
- Create a new layer above your image where you want to apply the overlay. Go to “Layer” > “New” > “Layer” or use the shortcut Ctrl+Shift+N (Cmd+Shift+N on Mac).
- Import the overlay image into Photoshop. You can do this by dragging and dropping the overlay file onto your Photoshop canvas or by going to “File” > “Place Embedded” or “Place Linked” and selecting the overlay image from your file directory.
- Resize and position the overlay as desired. Use the transform tools (Ctrl+T or Cmd+T) to scale, rotate, and move the overlay to the desired location on your image.
- Adjust the opacity and blending mode of the overlay layer to blend it seamlessly with your image. You can find these settings in the Layers panel, which is typically located on the right side of the Photoshop interface. Experiment with different blending modes and opacity levels to achieve the desired effect.
- Optional: Use layer masks to further refine the overlay. Layer masks allow you to selectively hide or reveal parts of the overlay layer. You can create a layer mask by selecting the overlay layer and clicking on the “Add Layer Mask” button at the bottom of the Layers panel. Use a brush tool with black or white color to paint on the layer mask and reveal or hide parts of the overlay as needed.
- Make final adjustments to your image, such as adjusting contrast, saturation, and sharpness, to ensure a cohesive look.